

3d Printer Axes Calibration

One of the most difficult things I found out about 3d printing was that you must calibrate it! This isn’t something that I was aware of, I assumed once everything was tightened that it would just work, I was so wrong!
The good news is, its quite a simple process once you know how and in this article im going to share with you, how I calibrate my printer and get perfect prints almost every time.
I use an Ender 3 with a lot of upgrades, but the process is the same for almost all 3d printers , so you should be able to follow this article without issue.
What you will need:
- 3d Printer
- Correctly tensioned belts (they should make a nice twang sound)
- Pronterface or Octoprint
- Digital Calipers
- Ruler (calipers sometimes get in the way but you may be ok)
- Tape or marker
- Filament
- Something to take notes on
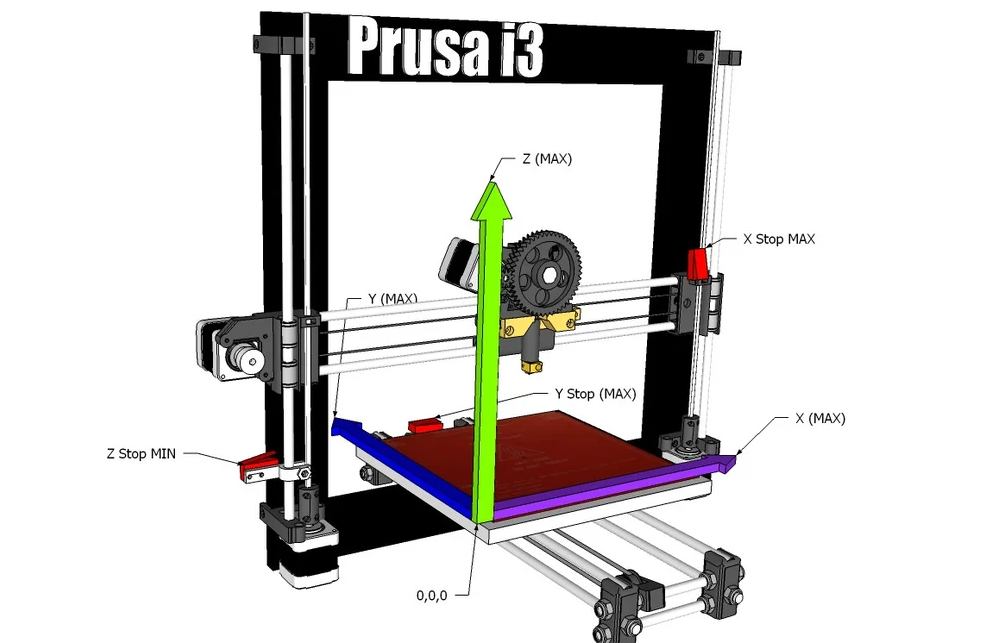
Axes Diagram:
Setup Software:
First we need to gather all the current settings, to do this you must first send a command to the printer, this can be done with either:
Pronterface
You must plug the USB into the printer and a computer, then launch pronterface, it should auto detect the printer, then click Connect
You can now enter commands in the right window next to the Send button
Octoprint
Once Octoprint is setup go to the terminal tab and you can enter commands here
Gather Initial Info:
Issue the command: M92 then press enter or hit send. you should see something like this:
1
echo: M92 X80.00 Y80.00 Z400.00 E93.00
Make a note of this information somewhere as we will be referring back to these values quite often.
Now we can begin to calibrate each of our motors.
X&Z-Axis Calibration
First start by homing your X axis and the Z axis. I will use the stop switch as the measuring point as this doesn’t move, however you can use any fixed point from the relevant axis.
First measure the distance from the stop switch to the edge of the moving part (X = Printhead, Z = Gantry) , if yours is touching the stop switch then the distance is 0mm.
Now tell your printer to move the Axis 100mm (you can set this to smaller or larger number as the calculation will still work) The further you move the axis the more accurate your calibration should be. Now with your calipers measure from the stop switch to the same point on the printhead, write down the measurement as “ActualDistance” you will need to do this for both the X & Z Axis
If you measured 100mm then you don’t need to do anything else, your axis is calibrated. However, you likely wont get exactly 100mm so we will need to adjust for this.
E Axis Calibration
There are two ways that you can calibrate the E Axis. With the HotEnd attached or without. Personally I prefer to remove the bowden tube from the extruder and measure this way, I find its much more accurate. Some people prefer to heat the HotEnd and let the filament flow through it.
First, remove your filament and disconnect the bowden tube, then we will need to push the filament through the extruder until you just see the end of it flat with the edge where the bowden tube attaches.
Now send 100mm to the E Axis to extrude (you will need to heat the HotEnd or it wont work)
Once this finishes, measure with your calipers the distance from the end of the filament to the extruder this should be 100mm, if not make a note of the measurement (ActualDistance)
Calculations
In order to calculate the Axis we need the following calculation, the calculation is the same no matter which Axis you are working on:
1
NewValue = 100mm / ActualDistance * CurrentValue
So if you have the below for your X Axis:
CurrentValue = 80.00 (M92 for the Axis) ActualDistance = 93 (how far the Axis actually moved) DesiredDistance = 100 (the amount we told it to move) 86.02 = 100 / 93 * 80
Based on the above, the new value for X would be 86.02
Applying New Values for all Axis
Now we need to apply all these values by running the M92 command again with your new values as below:
1
2
M92 X86.02 Y81.20 Z400.00 E149.00
M500
Also we add an M500 which will save the configuration, if you want to make sure the values have saved, restart your printer and issue M92 again you should see the new values.